Crags, Timberline, Seven Bridges Bed Assembly Guide
Note:
If at any point you feel confused, you may also watch a video of our “Low Profile Bed” being assembled at the link below. The video is no substitute for the more detailed instructions provided in the text guide below, but the video can be helpful to visualize some of the things stated in this guide.
Tools you will need:
-
Drill (Highly recommended)
-
9/16" Wrench (socket wrench preferred)
Headboard Assembly

-
Locate all of your pieces
-
3 Long Headboard Face Pieces
-
Shelves
-
2 Headboard Attachment Boards
-
4 Spacer blocks
-
1 "Headboard Hardware" box
- Optional: 2 Headboard Legs (2x4)
-
-
Lay out a soft blanket or use carpet if available. Lay out the 3 long headboard boards face down and in order. Use the markings on the back to order them and orient them correctly. They should read 1-3 top to bottom.
-
Insert the spacer blocks with the grain facing upwards as shown above. These will help you get the gaps correct. Next, line up the marked lines going down the 3 boards.
-
Locate the 1.25” screws. (Do not confuse them with any longer screws that might be provided in your kit. Using too long of screws could go through the face of the headboard.)
-
Place the 2 Headboard Attachment boards within the marked lines making sure to place the “L” on the left side and the “R” on the right side (see image above). Install the 1.25” screws making sure to not over tighten. The Hickory is extremely dense and screws can snap under the pressure of an impact driver or even a drill. Continue until all screws are installed into the boards.
-
If you are wall-mounting, continue with the following steps. If you are frame mounting skip the following steps on shelf installment until after the headboard is attached (since you will have easy access later).
-
Locate the shelves and note which one is marked “L” and which one is marked “R”. These correspond to the left and right side (when facing the headboard from the back side.)
-
Lean the headboard up against the bed or have a friend hold it up for you. (No matter how you do it, the important thing is that you can reach both the front and the back of the headboard, specifically where the shelves are being attached.)
-
Locate the predrilled shelf screw holes. From the back, send two 1.25” screws through the headboard until they are poking out 1/8 inch. Use these to line up the headboard with the pre-drilled shelves and finish attaching the screws!
The Bed Frame
Step 1:
- Begin by clearing a large area to do the assembly in. (You’ll need the space.)
Step 2:
- Locate all 3 side rails and the corresponding back rail.
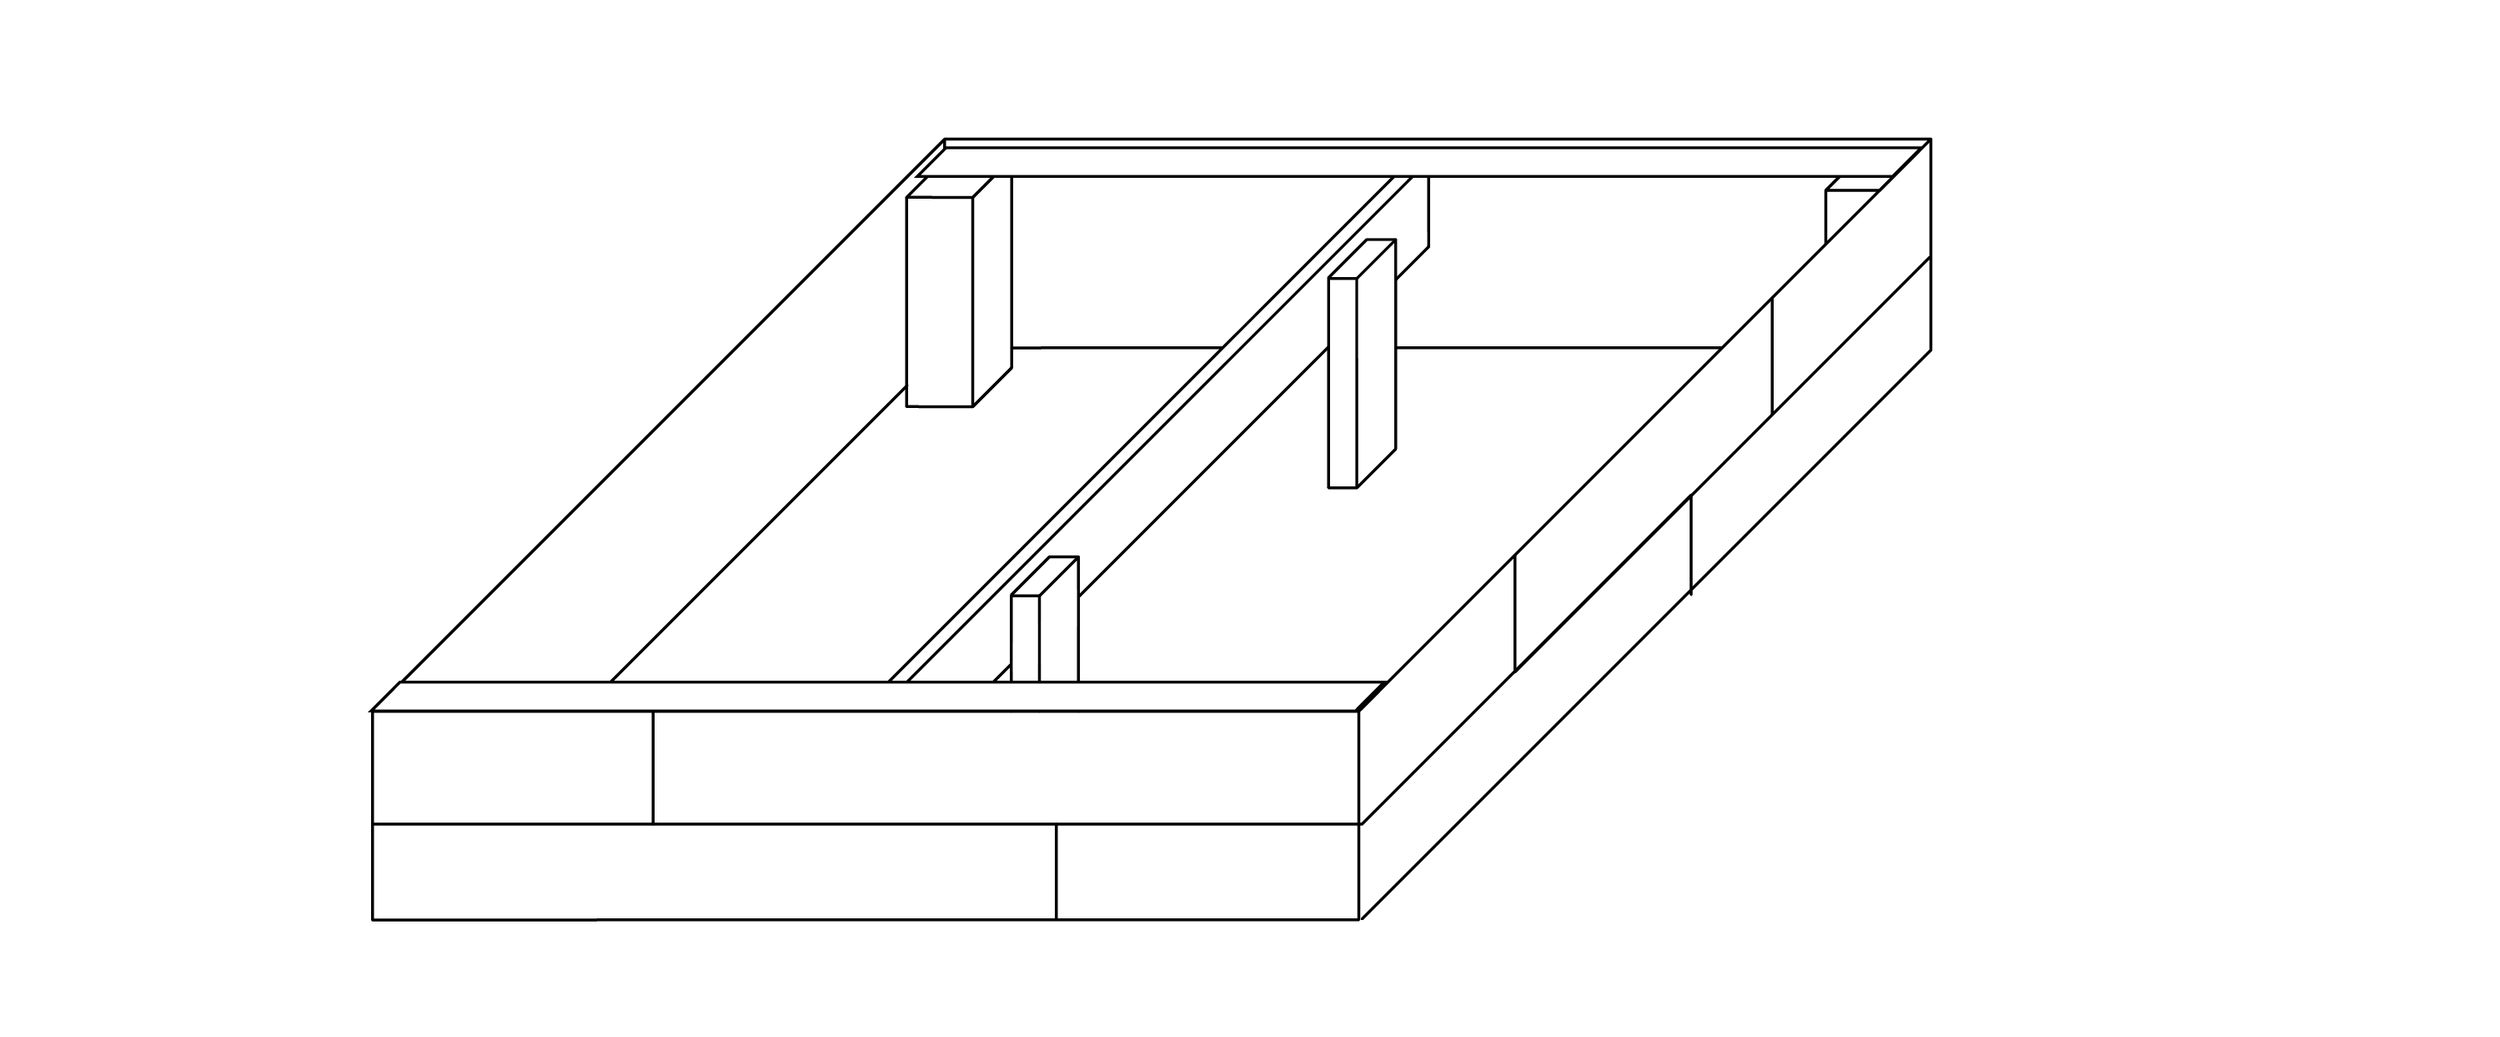
- Place the front/side rails and back rail face down on the ground making sure to match the ascending letters together (A with B, C with D, etc.) (example shown below)
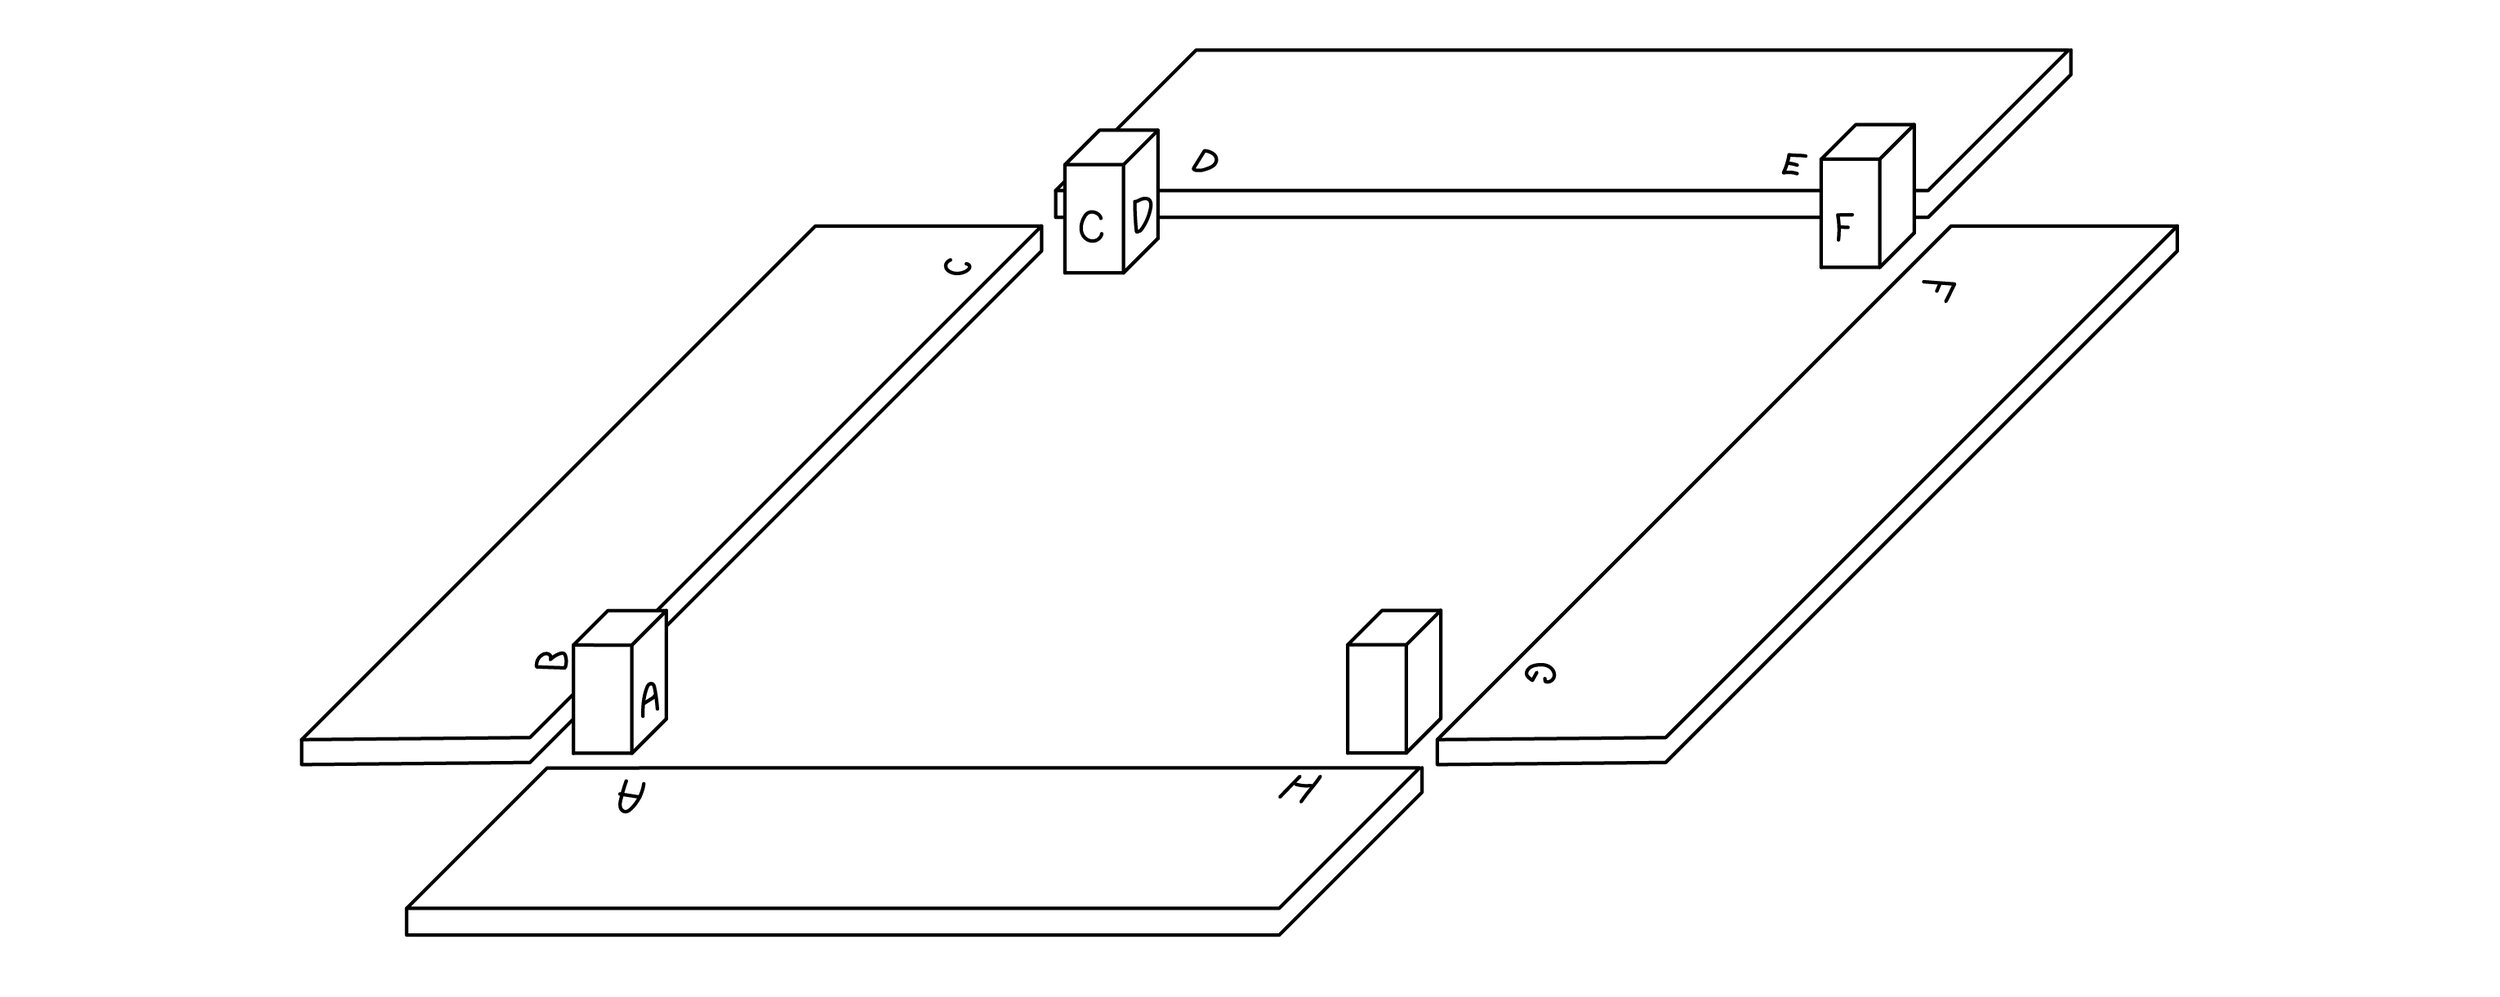
- Place the corner blocks in their corresponding corners by matching their letters together (A with A, B with B, etc.)
- If assembling a “Royal Gorge Bed”, install the front stretcher within the black lines at the bottom of the front rail using the provided screws. If the front stretcher is already installed or if not assembling the “Royal Gorge Bed”, proceed to next step.
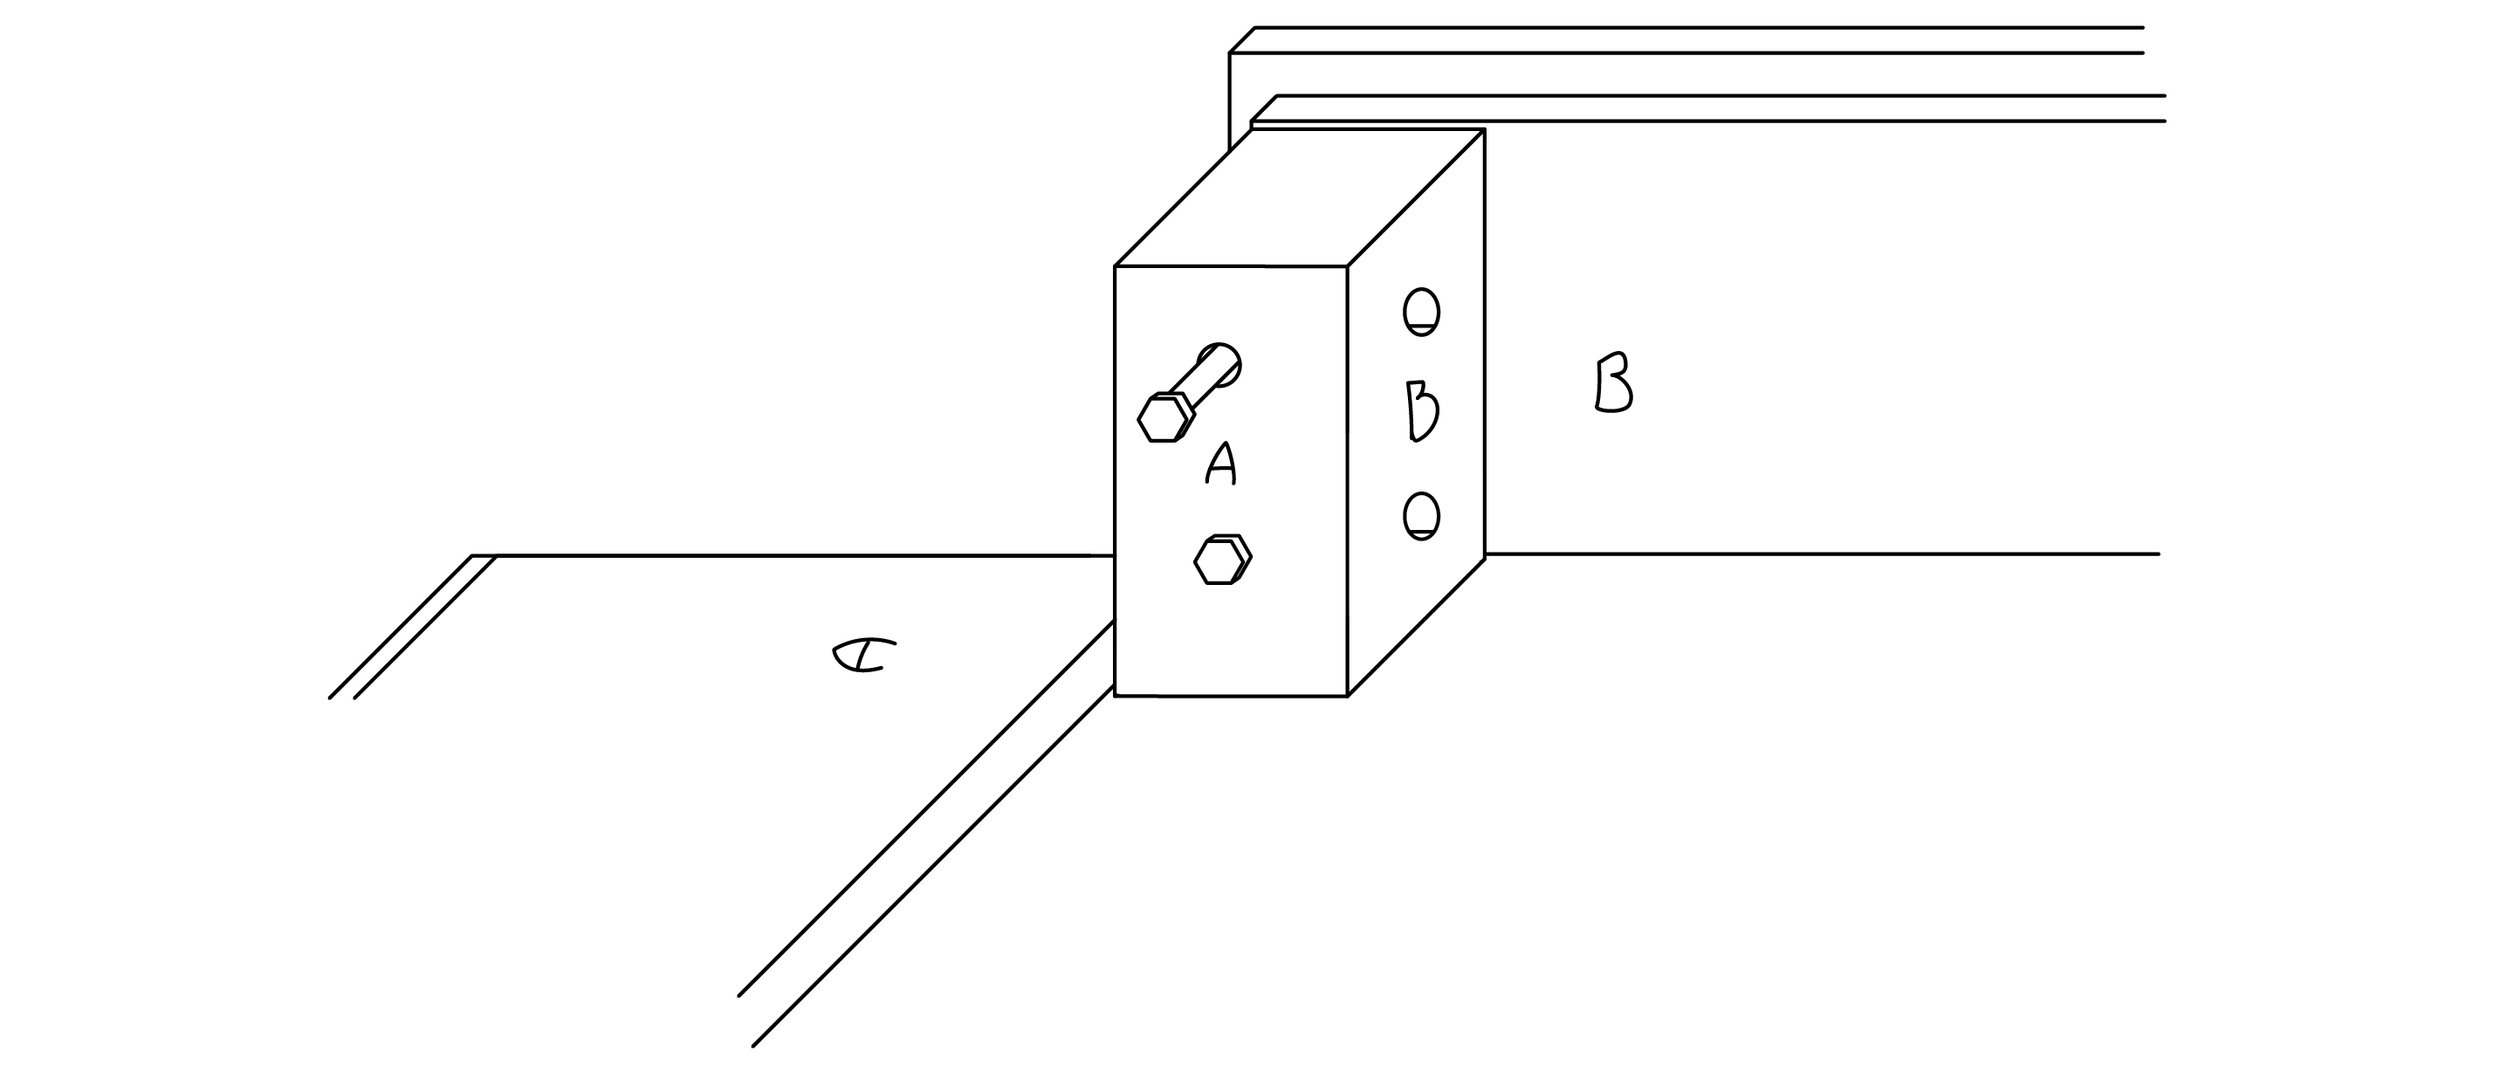
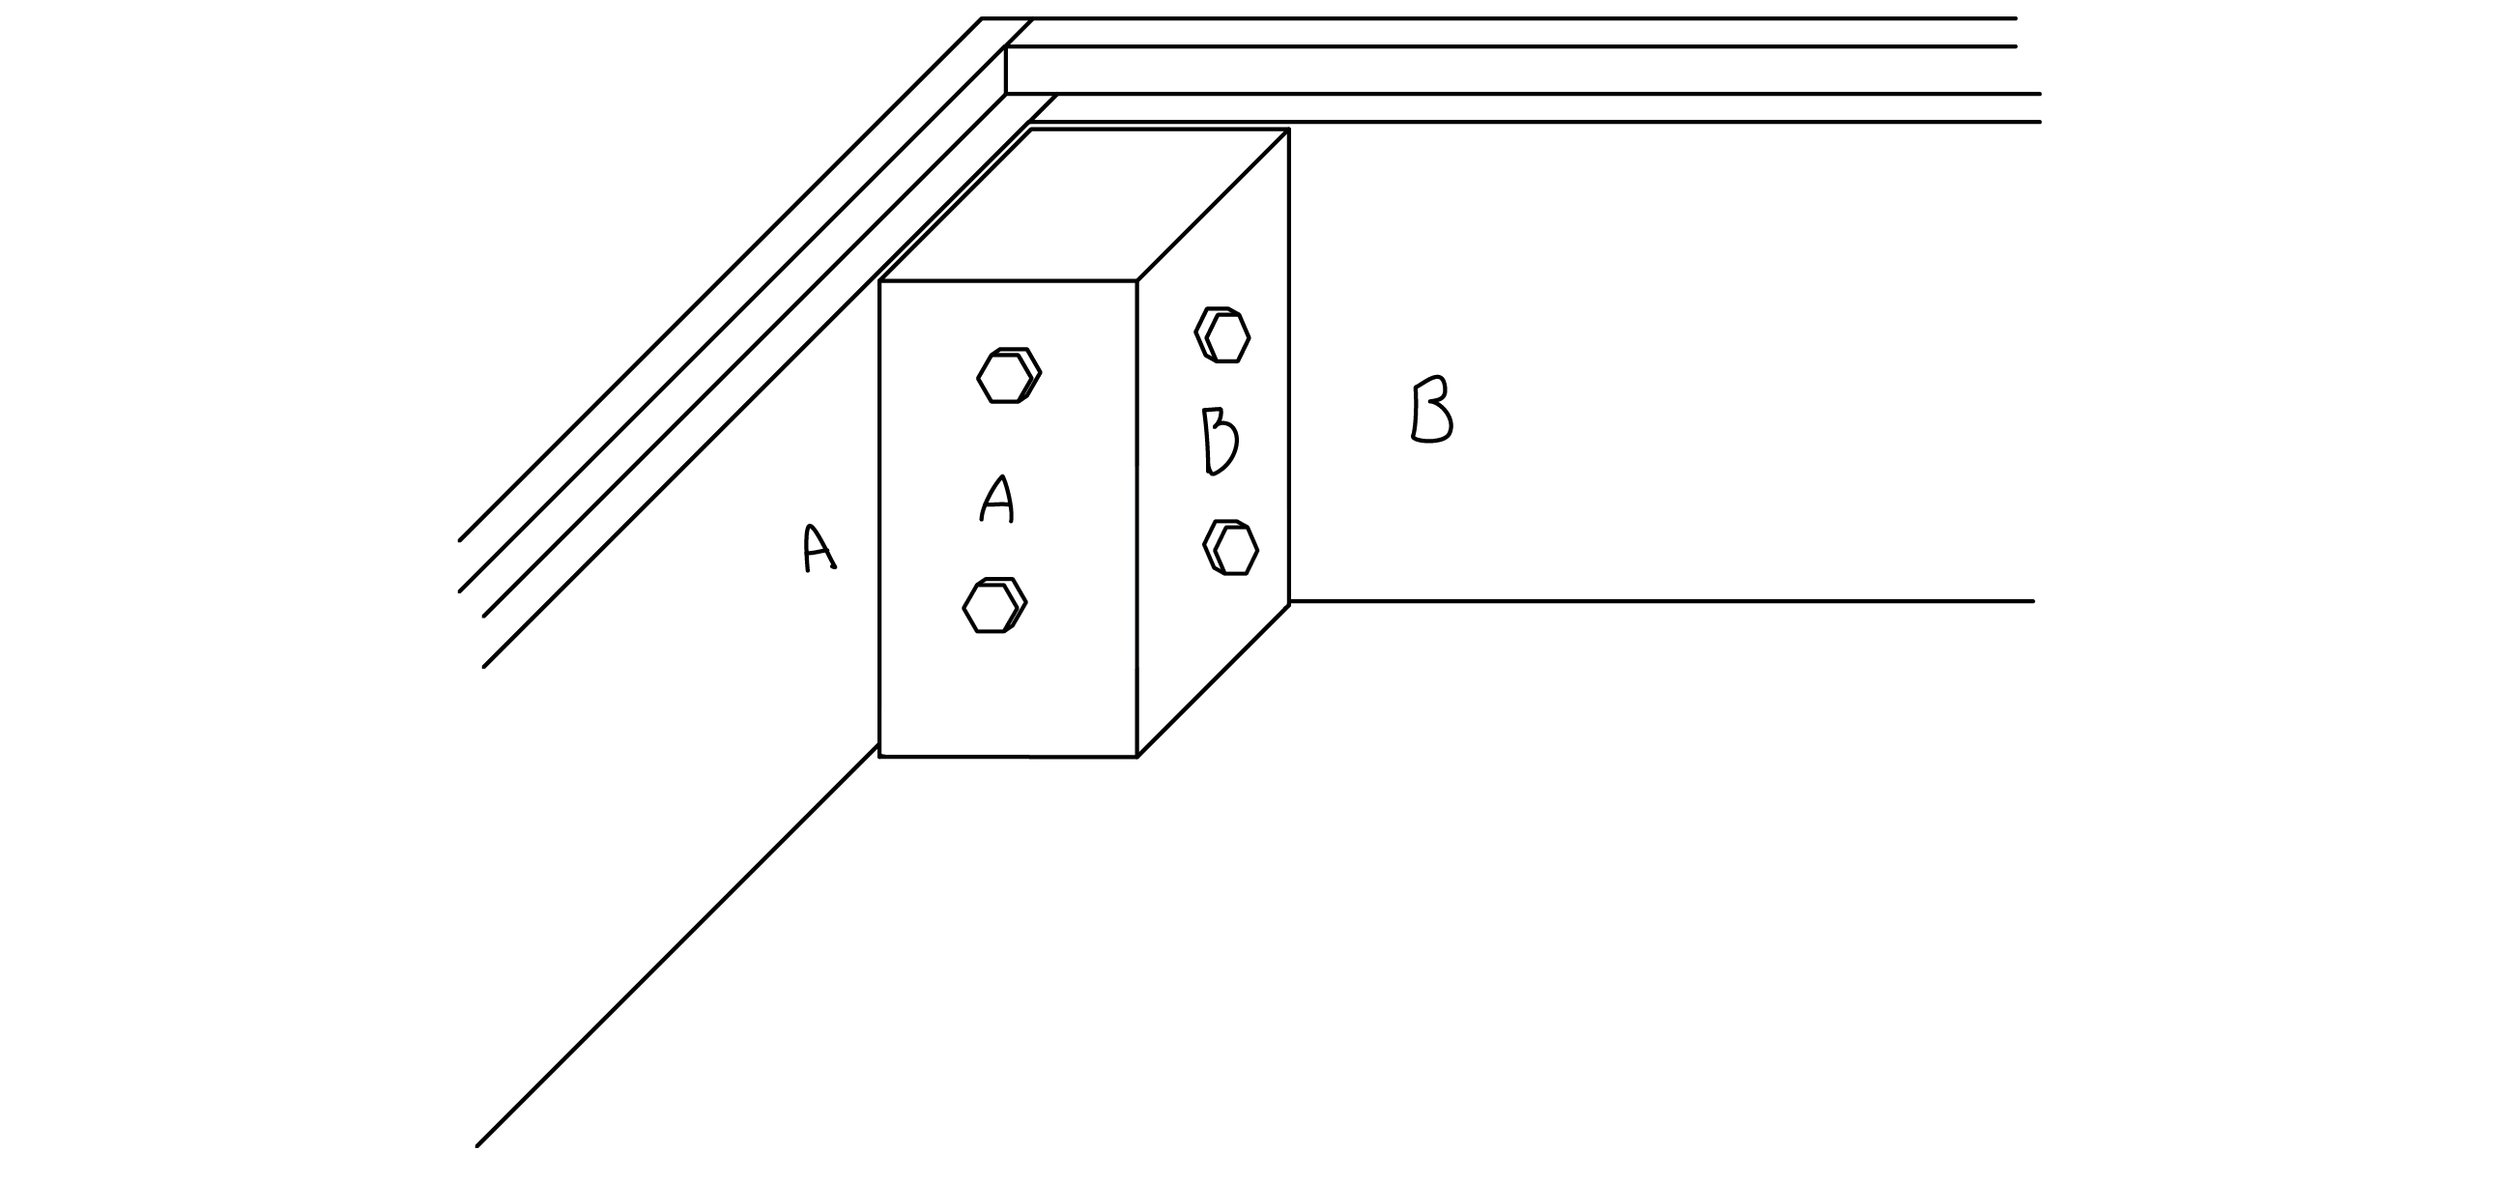
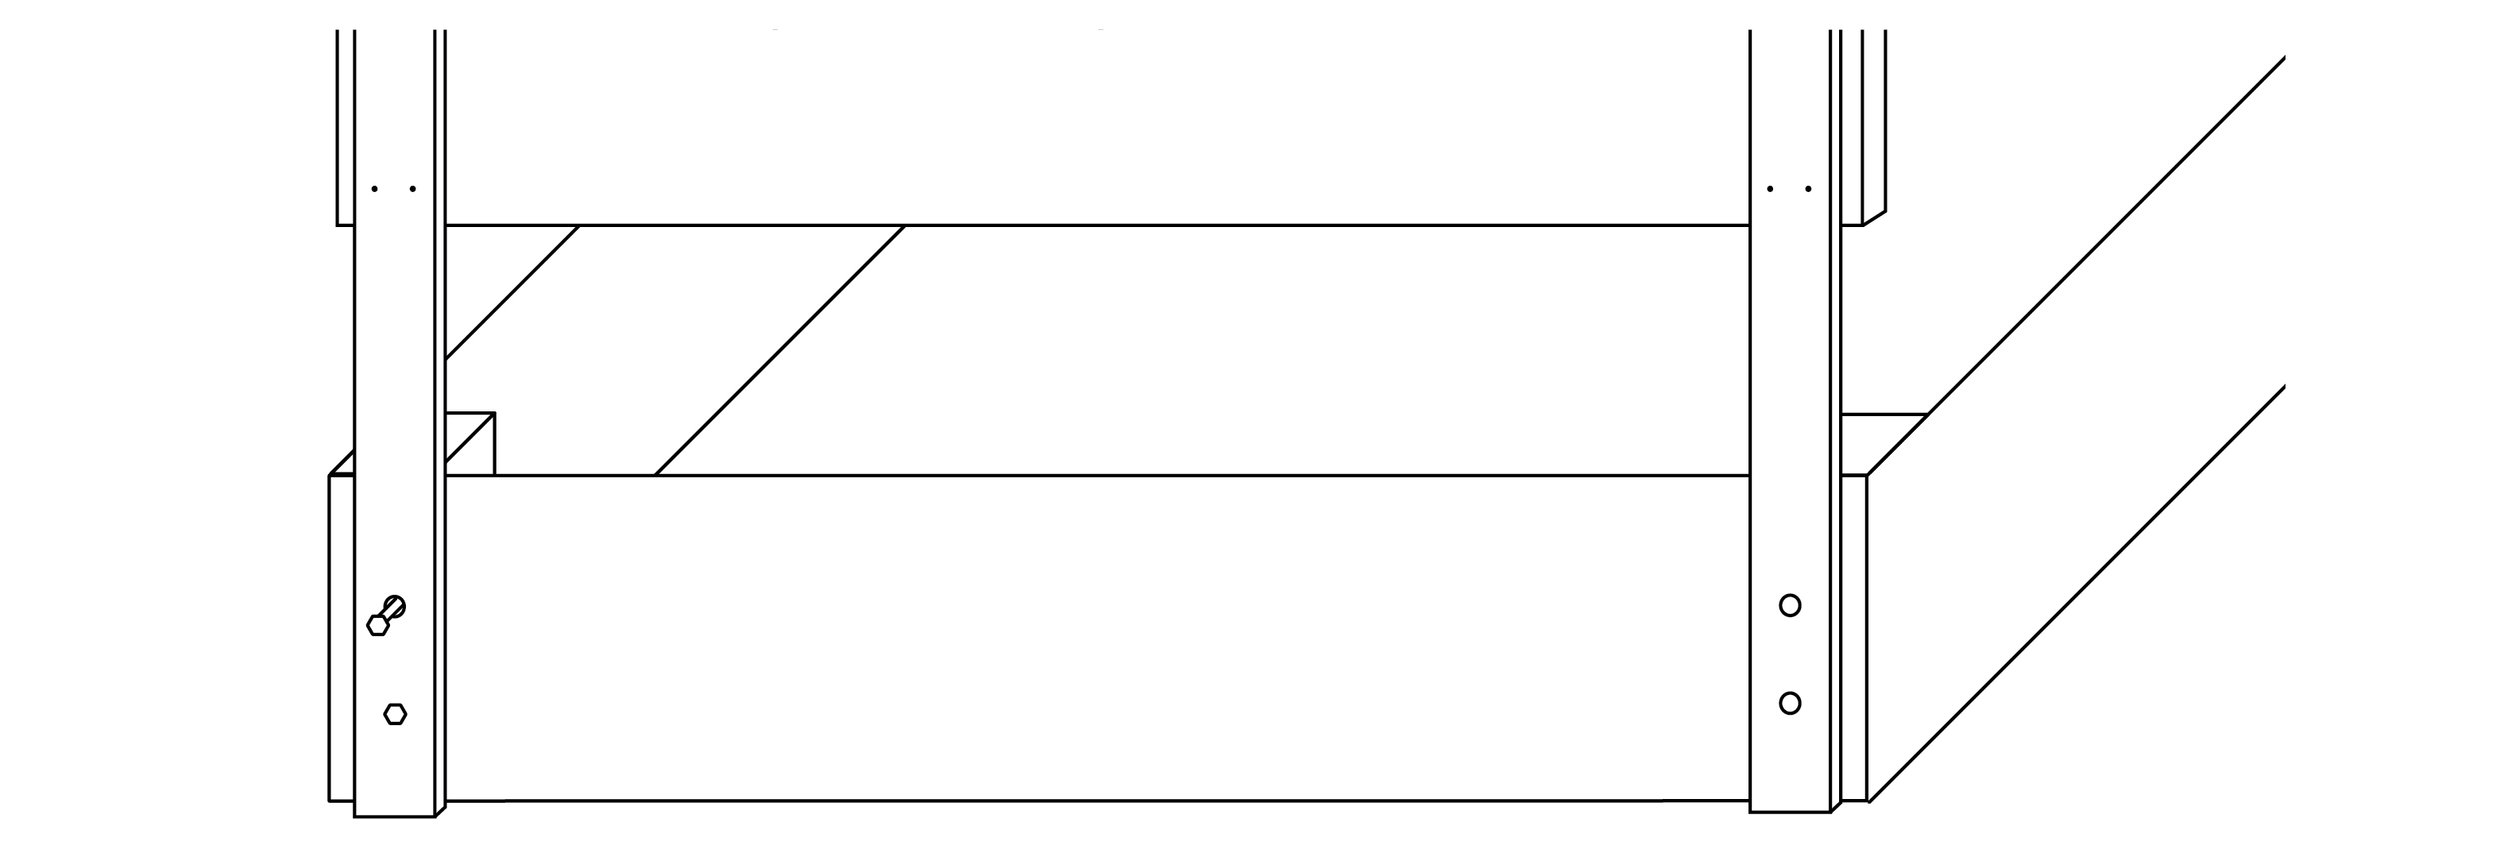
- Locate the 4” or 5” bolts and corresponding washers. Thread 1 washer onto each bolt.
- Begin attaching the bolts through the corner block into the front/side rails. Begin threading by hand, and then use the wrench to tighten. (There are two per side. Don’t tighten one all the way without beginning the other one as well, or they won’t be aligned.)
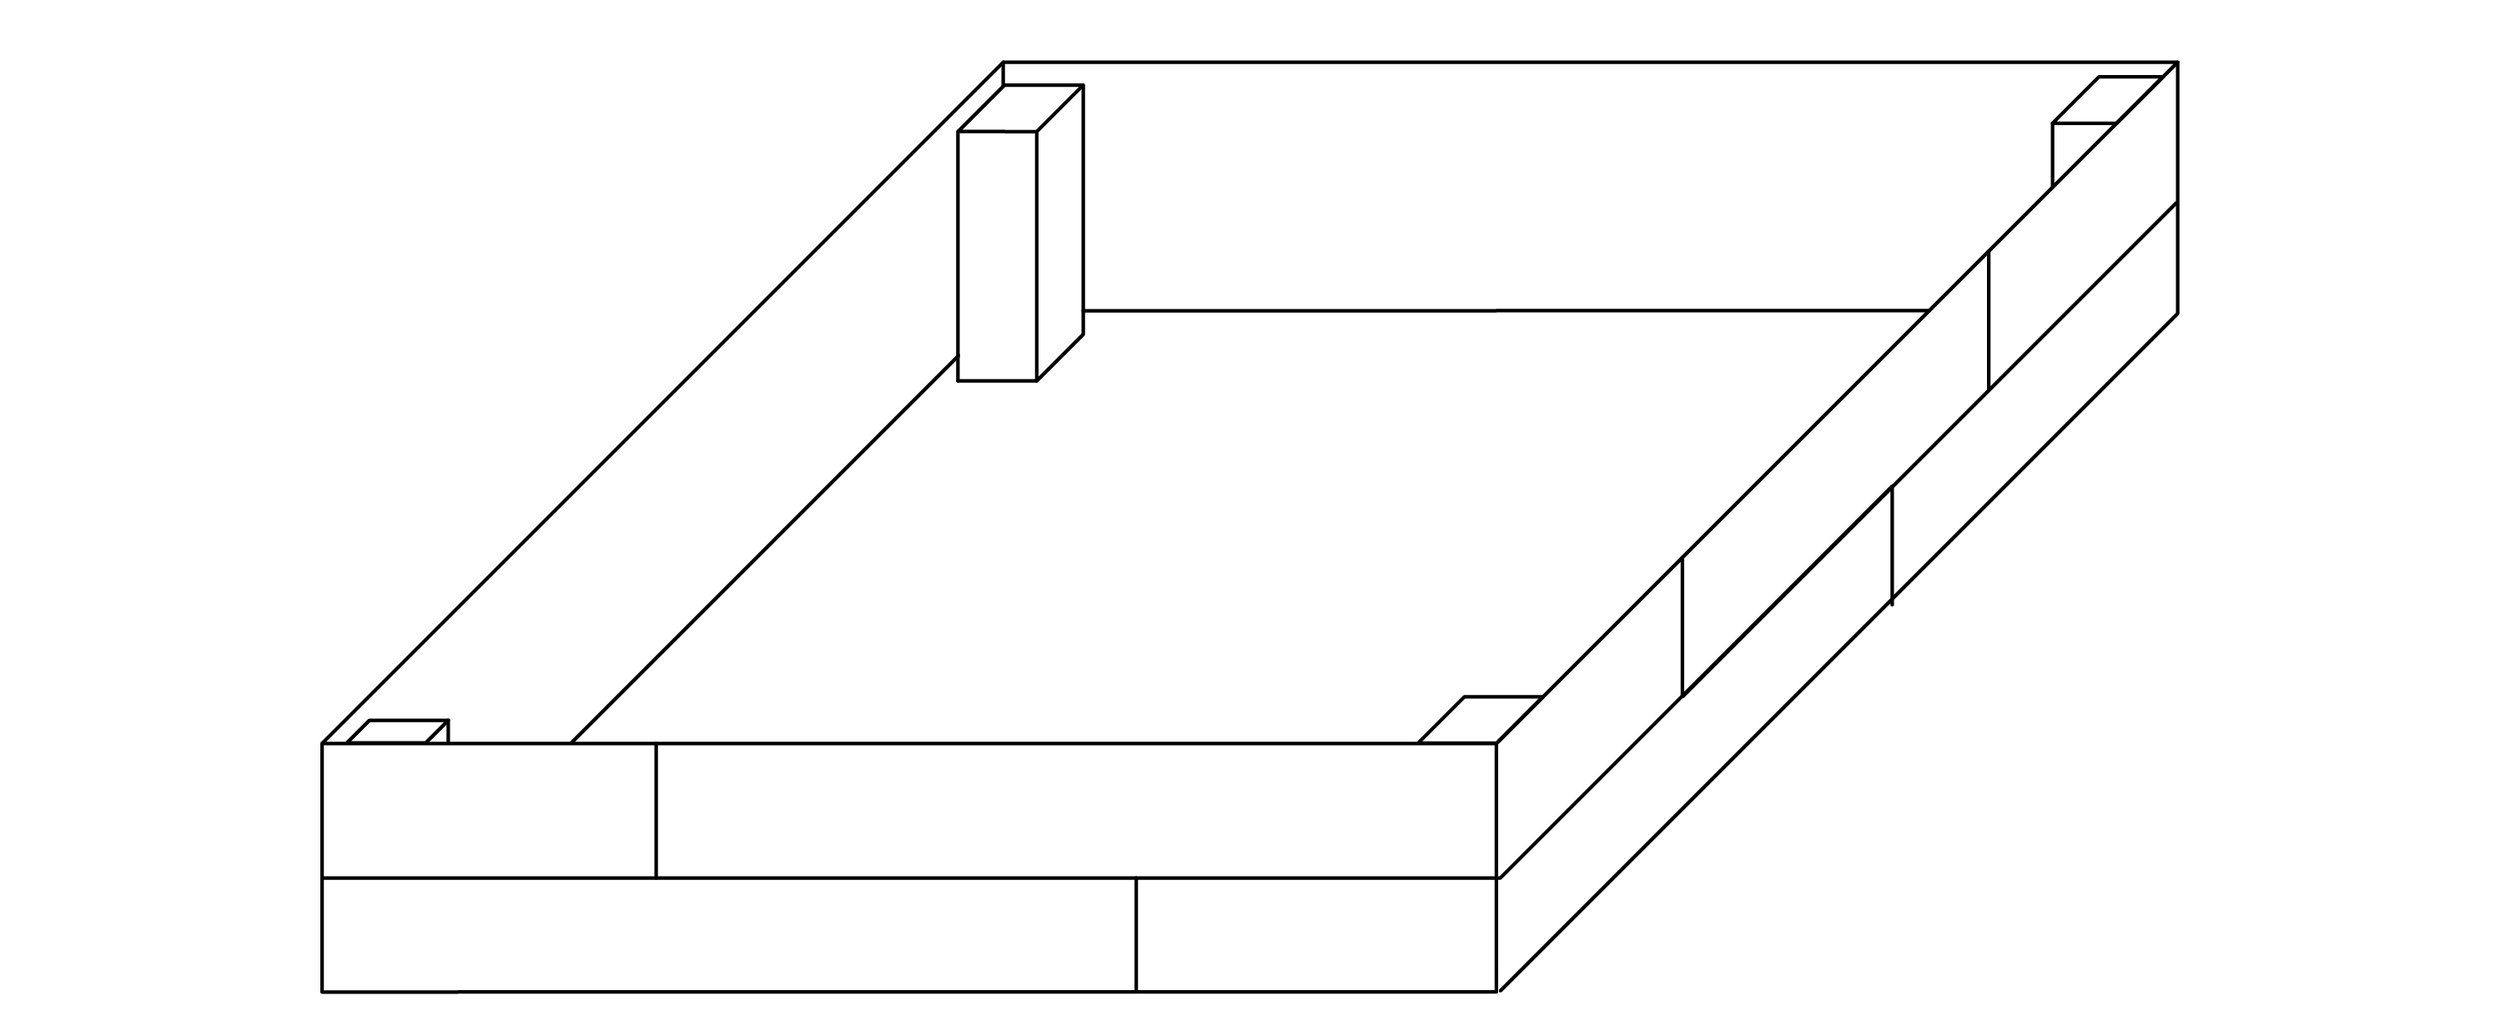
- Once this step is completed, all 4 sides (the 1 front rail, the 2 side rails, and the back rail) should be put together as pictured below.
Step 3:
Install slat #1 and slat #7 (#8 for a Cali King bed). The slat marked #1 should go right up against the edge of the footboard and #7 should go right up against the back (there are black lines to help you line them up with the pre-drilled holes. Use 1.25” screws to install into the pre-drilled holes.
- Assemble center support beam by attaching 2x4 legs to it using the 2.5” screws provided. If center support beam legs are already attached, move on to next step.
- Install center support beam by sliding it underneath the two slats already installed. Position it down the center of the bed, and attach it to the slats. Use 2 of the 2.5” screws provided (1 at each end using the pre-drilled holes).
Step 4:
- Locate the other 5 slats. The slats are numbered and the side rails are marked with lines for where to attach them. Attach the slats to the frame using the 1.25” screws sent with the bed. Attach them in ascending order. (See picture below)

Step 5:
- As stated in the listing, these beds are made to be wall-mounted unless specially requested to be otherwise. If you have received a wall-mounted headboard, use the “Wall Mounting Guide” to finish your install. If you have requested frame mounting, proceed through the following steps.
Frame Mounting Guide
- Lay headboard face down on soft blanket, towels, or carpet
- Match the legs to their correct side by matching the corresponding letters together. Place the legs on top of the headboard attachment boards under the black lines drawn.
- Use the 2.5” screws provided to attach legs to headboard. Do not over tighten. Over tightening can cause stripping and reduce strength.
- Get the headboard into position. If helpful, place the headboard, on its legs, against the wall behind the bed frame as shown below.
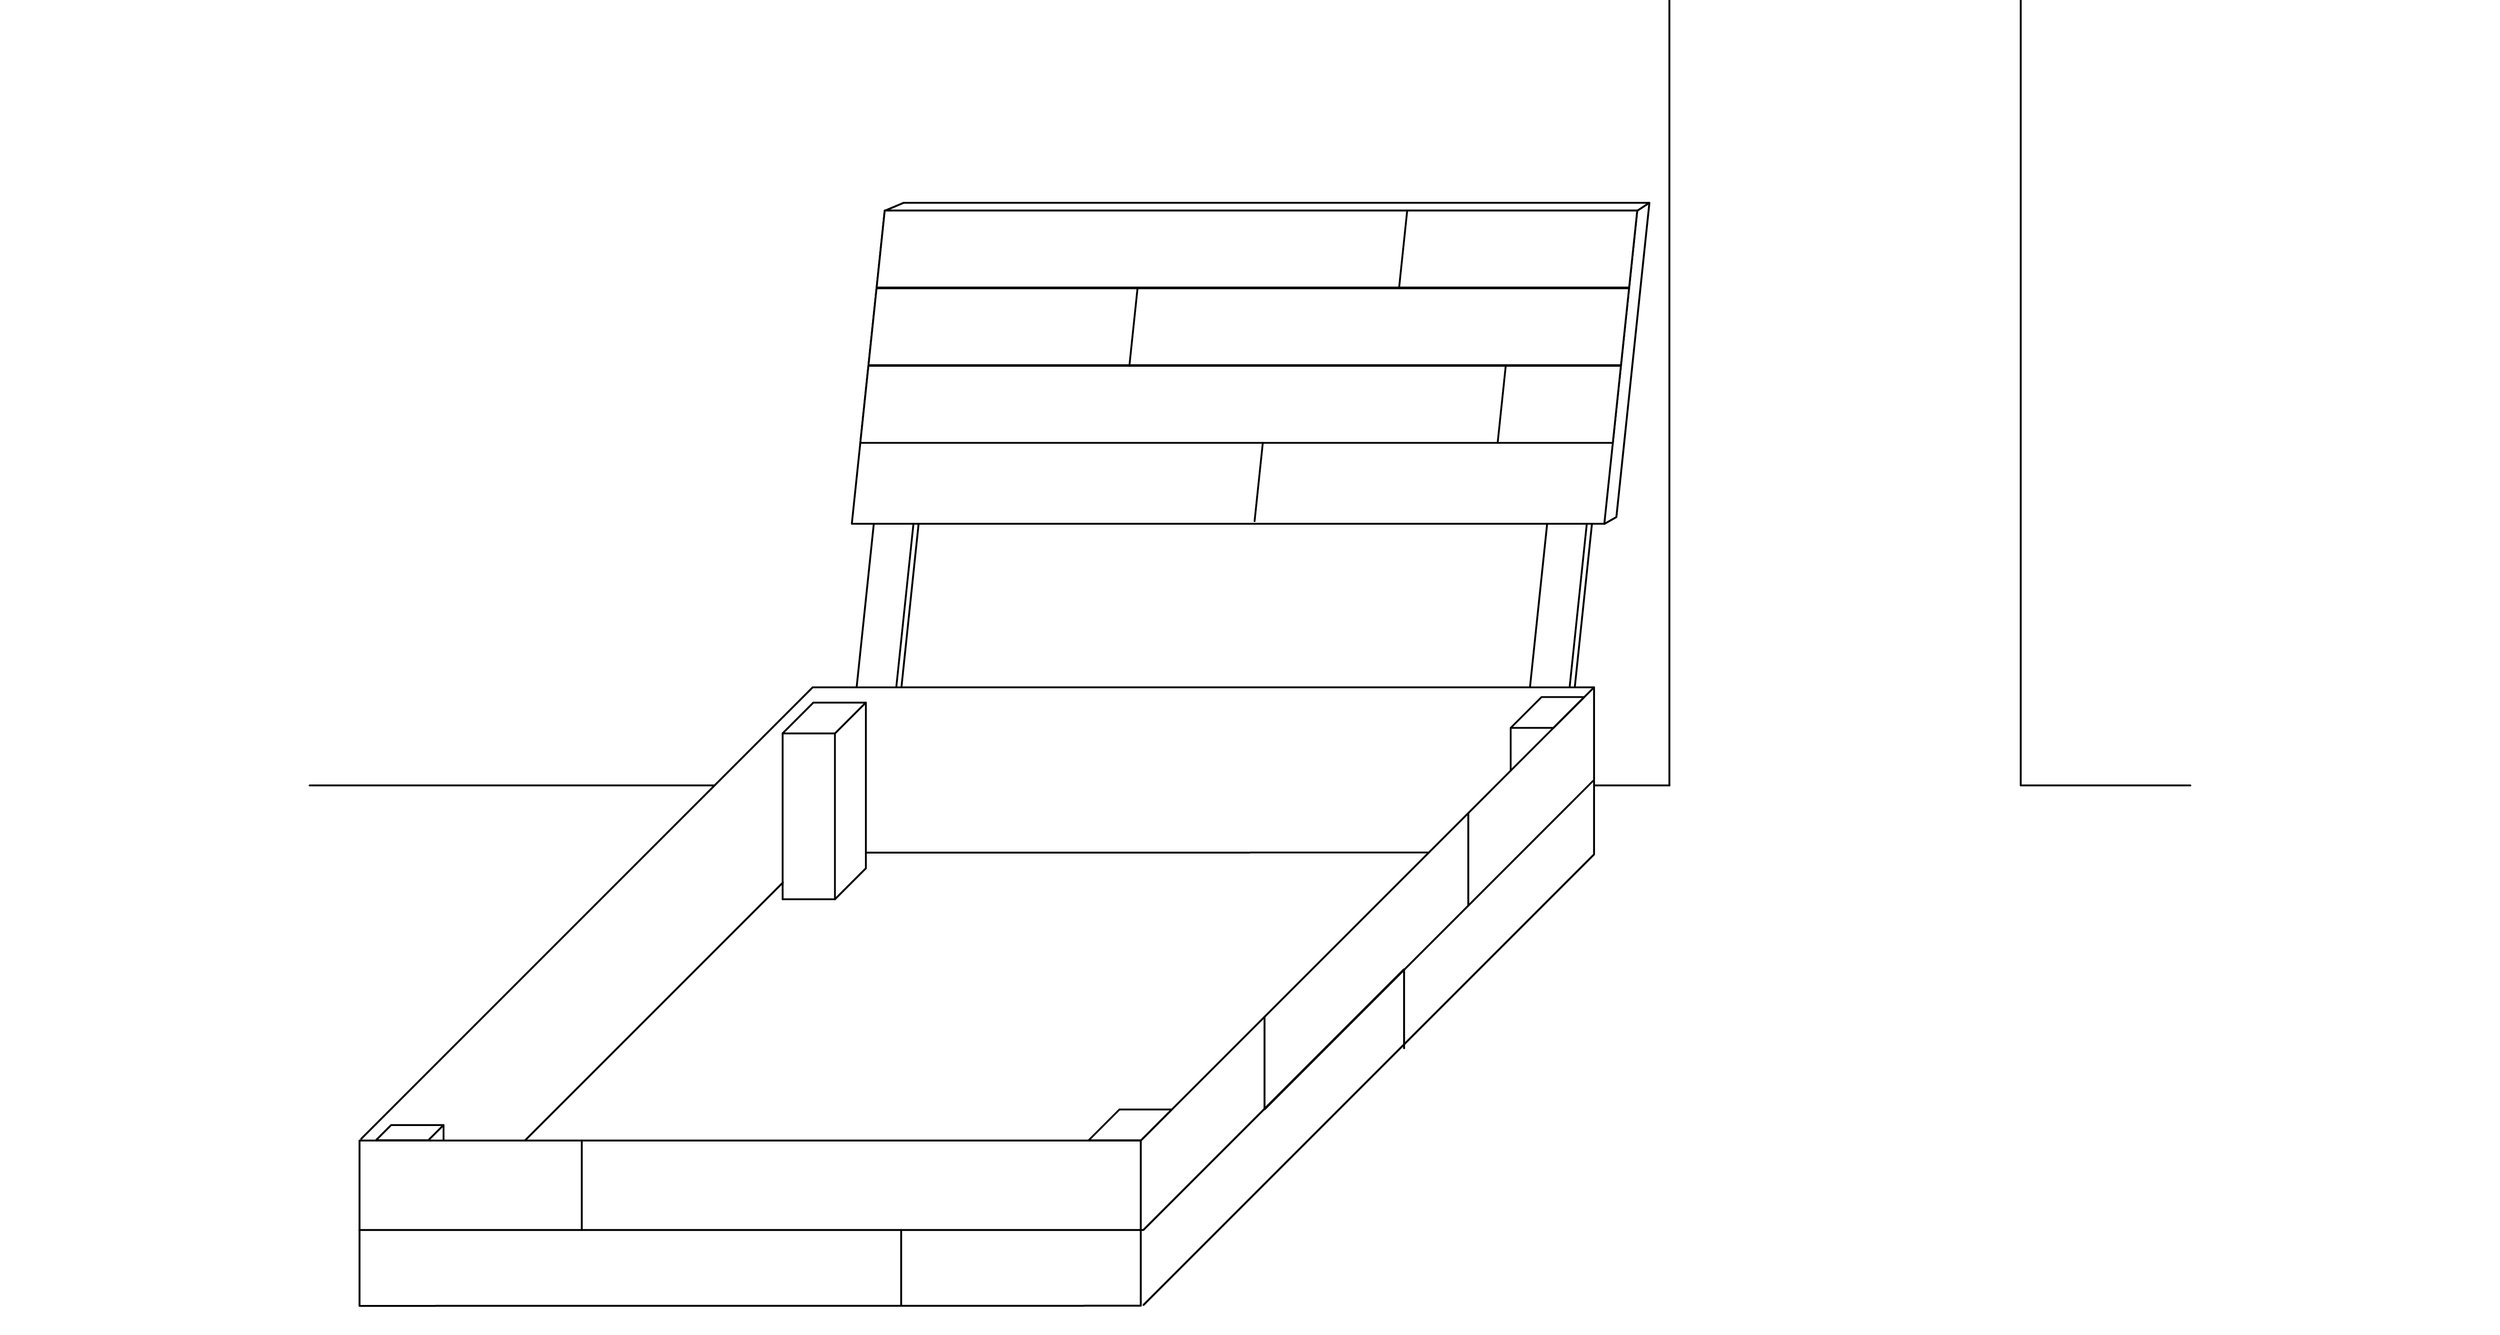
- Line up the headboard legs within the black lines on the back rail of the bed frame. Install 4 of the 3” screws provided into the pre-drilled holes. Have friend help hold headboard if necessary.
- Return to headboard assembly step 7 to install the shelves.
Please contact us if you need any help!
marcus@dannerfurniture.com